Instructions for Annual Assessment Reporting: Complete Your Annual IE Report within the Nuventive™ Improvement Platform
CHECKLIST for 2024-2025 Cycle
- Add Assessment Results for all active Assessment Methods associated with SLOs/Goals marked for assessment in the 2024-2025 Planned Assessment Cycle.
- Change Results Date if needed. It will auto-populate with today's date
- Reporting Period. Enter Reporting Period 2024-2025
- For data collected during a summer term, include the summer results with the academic year that follows (i.e. Summer II 2025 assessment data should be reported during the 2025-2026 Assessment Cycle).
- Result discussion information
- Include the number assessed (n=x), numerical results data, and analysis and interpretation of the results. This may include a comparison of current results to previous results, descriptions of levels of performance, or a discussion of what factors may have contributed to performance on the measure. Ensure the description included here supports what was gathered through the Assessment Method.
- Conclusion
- Only select Inconclusive if the results were unable to be collected. Otherwise, select either Met or Not Met.
- Add the Follow up on the Previous Year Action Plan
- If you implemented an action plan or modification from the previous year, describe what impact that had on the collected assessment results. If you did not implement an action plan in the previous year, enter “N/A.” Please refer back to the previous year's Results entry to locate the previous year's action plan.
- Add Action/Use of Results
- This is required if your Conclusion was Not Met or Inconclusive. However, it is helpful to include to document any planned changes or revisions and to show how you are using the assessment results. This information will provide actionable and detailed information to follow up on next year.
- Describe how the results will be used to seek improvement on the student learning outcome. This should include an action or modification that impacts curriculum/pedagogy or operations/services, not simply a change to the method of assessment. In cases where the standard of success was met, you may also enter an action which describes how the results will be used to seek further improvements.
- Describe when the actions will be taken and who will be involved in implementing the change.
- Add Related Assessment Documents
- Any documents from the Document Repository
- Newly related documents being added from your computer
- Completing Your Annual IE Report within the Nuventive™ Improvement
- Update the Assessment Plan
- There are three (3) scenarios that may occur at this point:
- No changes are made to the Assessment Plan SLOs/Goals except to update the planned assessment cycle (if the SLO/Goal will continue to be assessed for the next cycle)
- Planned Assessment Cycle (full year ex. 2025-2026). One or more SLOs or Goals should be marked for Planned Assessment Cycle 2025-2026. Up to two or three years can be added.
- There are changes or edits to existing assessment plan SLOs/Goals and/or assessment methods needed
- Review existing SLOs or Goals
- Update the name of the existing SLOs/Goals if not done previously
- Add a start date to the existing SLOs/Goals if not done previously
- If the Learning Outcome will no longer be used, select Phased Out as the Status and enter a Phased Out date. DO NOT DELETE the SLO.
- Once edits are complete and saved, add the Planned Assessment Cycle (2025-2026)
- Review existing Assessment Methods
- Update the description of the Assessment Method. Include a description in the Notes field about the changes made for historical reference.
- Update the Standard of Success. If you are changing the Standard of Success for future assessment cycles, please copy and paste the previous Standard of Success into the Notes field with a note about the update so that this change is evident in historical reporting.
- Review existing SLOs or Goals
- New SLOs/Goals or Assessment Methods are being added and will be assessed for the upcoming cycle(s)
- Add new SLO/Goal
- SLO/Goal Name
- SLO/Goal Statement
- This will be the complete phrase or statement of the learning outcome or goal. Keep in mind that an SLO is defined as what students are able to demonstrate in terms of knowledge, skills, and attitudes upon completion of a program while a goal is defined as an observable and measurable outcome that assesses a particular process, service, or experience.
- SLO/Goal Status (should be active)
- Planned Assessment Cycle (full year ex. 2025-2026). One or more SLOs or Goals should be marked for Planned Assessment Cycle 2025-2026. Up to two or three years can be added.
- Start Date, if known
- Phase out Date, if known and relevant
- Add new Assessment Methods(for an existing SLO/Goal or a new SLO/Goal)
- Assessment Type (drop down list)
- Assessment Method Statement
- Information entered here should include what is being assessed, who administers the assessment, who is being assessed, a description of the assessment measure, when the assessment is administered, and where it is assessed (for example, physically or during a certain time cycle). Please be as detailed as possible in this section, keeping in mind that someone not familiar with the assessment could be reviewing this information during the IE Cycle.
- Standard of Success
- The Standard of Success should set a numerical criterion for evaluating results, align with the assessment method, and relate to the type of assessment data collected. For example, 85% of graduating students will achieve a 4 or better on the final presentation rubric.
- Internal notes for author or others reviewing the assessment method.
- Map New SLOs or Goals
- University Marketable Skills(Academic Programs, Support Units with student learning outcomes)
- College/Division Level Map
- Review Feedback on Assessment Reports
- Access completed forms under Plan Review/Approval for each reviewing group
- Review comments, if provided
- If revisions are requested prior to the reviewer approving the report, you will be contacted directly by email with that request
- Add new SLO/Goal
Guided Instructions for 2024-2025 Cycle
1. To locate your program or division, begin typing the name of your program or division in the search bar at the top to access the appropriate assessment plan if you author more than one plan. If you author one plan, Nuventive Improvement should open to your program or unit home page.
Adding Assessment Results

2. Using the Main (hamburger) menu to the left of the search bar, navigate to the Plan and Results tab.
3. To view information, either double-click on the SLO/Goal or click on the ellipsis located on top right corner for each SLO/Goal, click Open and then select the Results card.
- a. Results that have already been entered for previous cycles SHOULD NOT be changed or updated at this time. Leave them as they are and consider them locked.
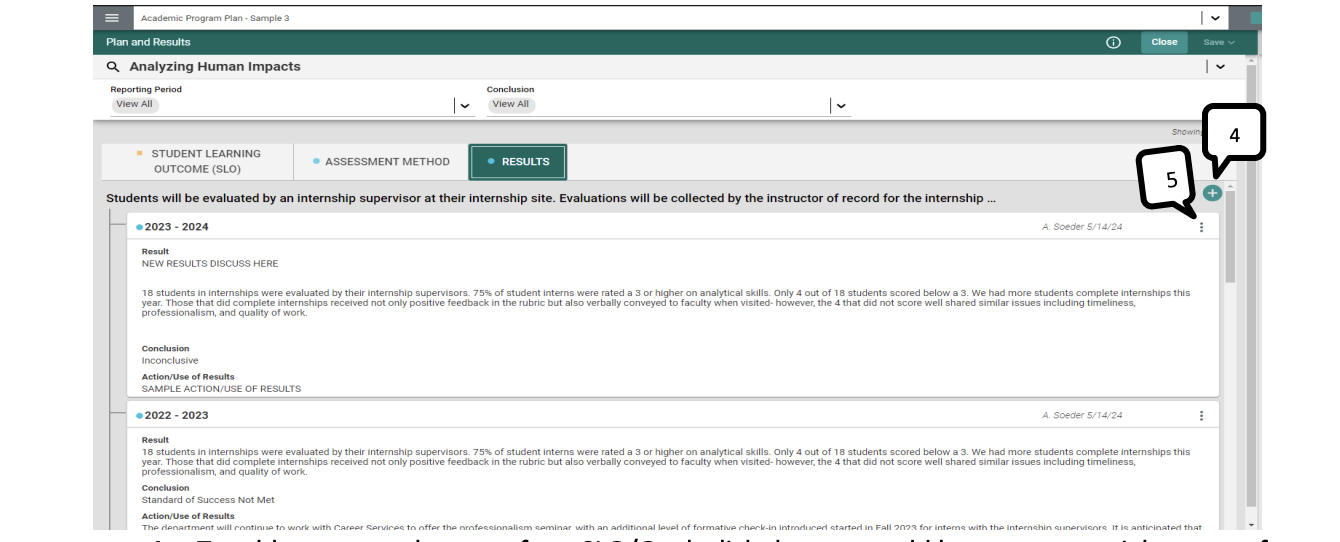
4. To add a new results entry for a SLO/Goal, click the green add button on top right corner for SLO/Goal.
- a. Note the Assessment Method and SLO/Goal information that will appear at the top to inform which Assessment data is being entered.
5. Click on the ellipsis located on top right corner for each SLO/Goal to view previous results entries and then click Open.
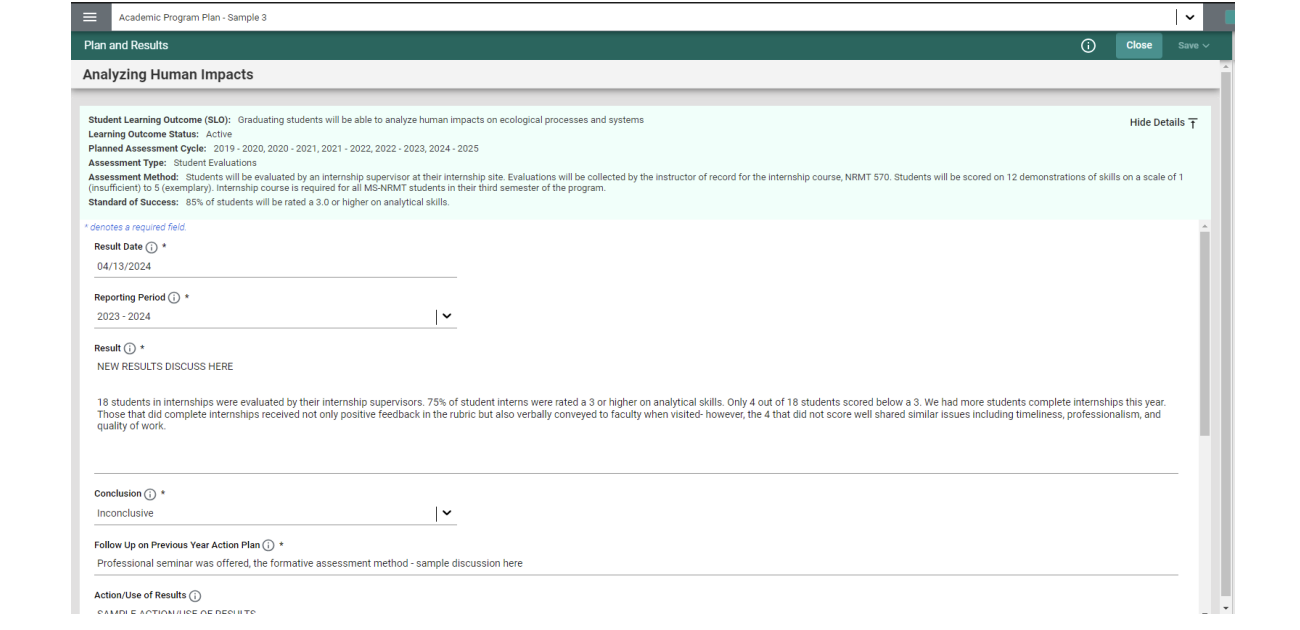
6. The Result Date will auto populate with the date you access the Results page, most commonly the date the results are being recorded in Nuventive.
7. Select the Reporting Period from the drop-down list. This will be the assessment cycle in which the results were collected. For data collected during a summer term, include the summer results with the academic year that follows (i.e. Summer II 2025 assessment data should be reported during the 2025-2026 Assessment Cycle).
8. Add the Result discussion information.
- a. Be sure to include the number assessed (n=x), numerical results data, and analysis and interpretation of the results. This may include a comparison of current results to previous results, descriptions of levels of performance, or a discussion of what factors may have contributed to performance on the measure. Ensure the description included here supports what was gathered through the Assessment Method.
9. Select the results Conclusion from the drop-down list. Only select Inconclusive if the results were unable to be collected. Otherwise, select either Met or Not Met.
10. Add information in the field. If you implemented an action plan/modification in the prior year, please describe what impact it had on the results.
- a. If you implemented an action plan or modification from the previous year, describe what impact that had on the collected assessment results. If you did not implement an action plan in the previous year, enter “N/A.” Refer back to prior year's (2023-2024) Action/Use of Results as needed.
11. Add the Action/Use of Results information for each Assessment Result. Describe how the results will be used, including actions being taken to seek improvement.
- a. This is required if your Conclusion was Not Met.
- b. This should include an action or modification that impacts curriculum/pedagogy or operations/services, not simply a change to the method of assessment.
- c. In cases where the standard of success was met, you may also enter an action which describes how the results will be used to seek further improvements.
12. If adding Supporting Information and/or Related Documents, see next section.
13. When you are done adding the Results data, click the Save drop down and select Save & Close located on the top right corner.
Adding Supporting Information and/or Related Documents
14. To add Supporting Information in the form of Charts, Graphs, etc., click in the box supplied and select from the options provided on the menu bar.
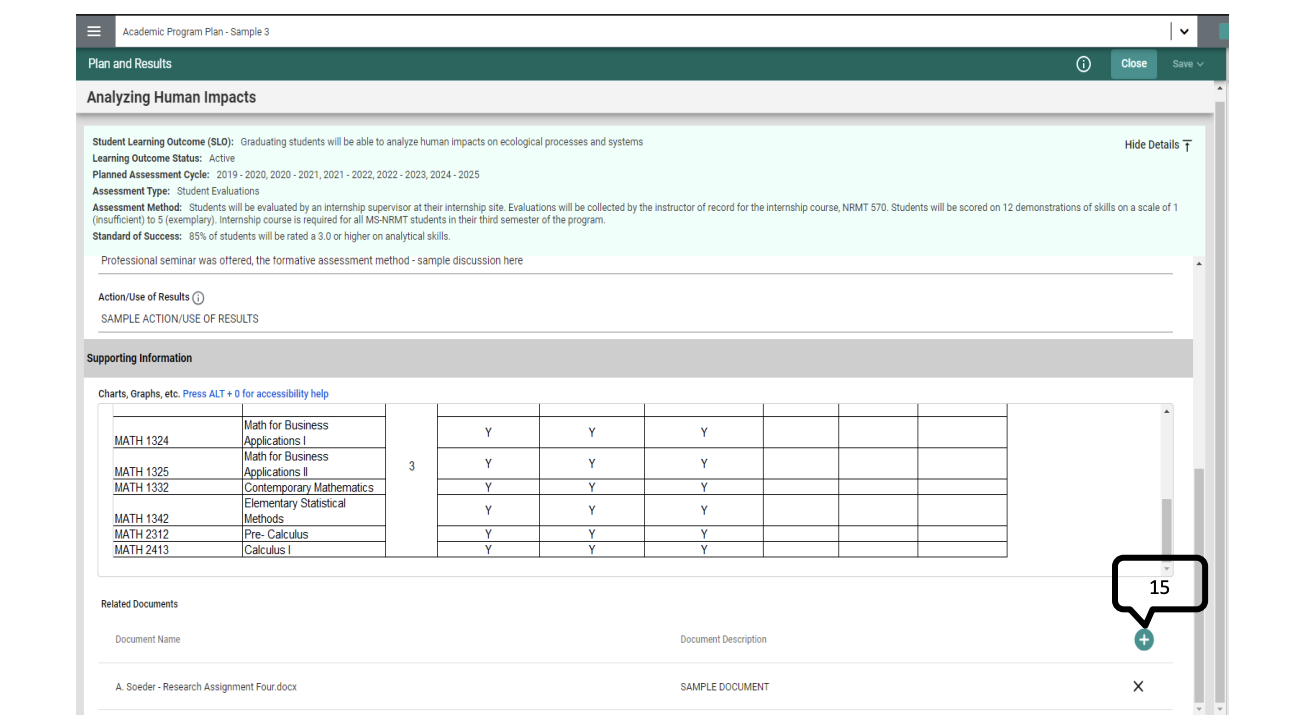
15. To add saved Related Documents to support the assessment results, select the green add button to open the available Document Repository for the Assessment Results entry. (See Step 19 to add new Related Documents.)
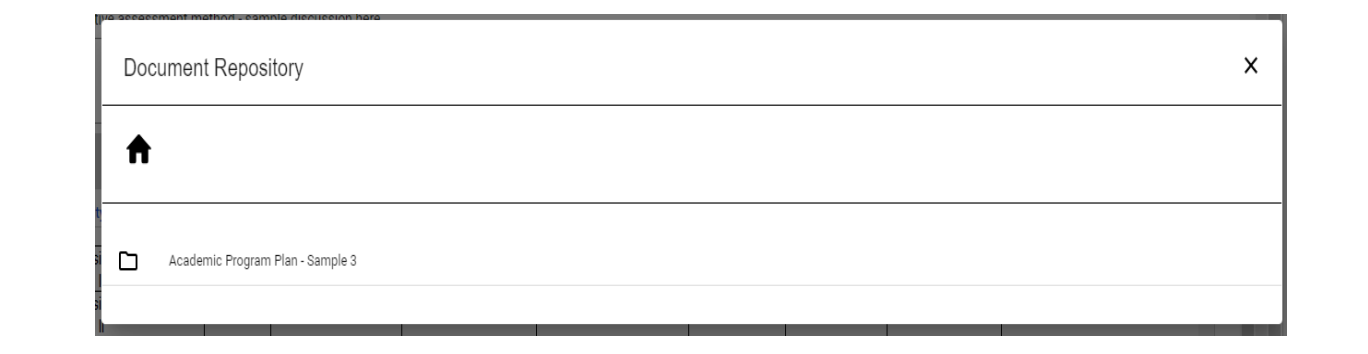
16. To access the available documents, click on the folder under the home symbol.
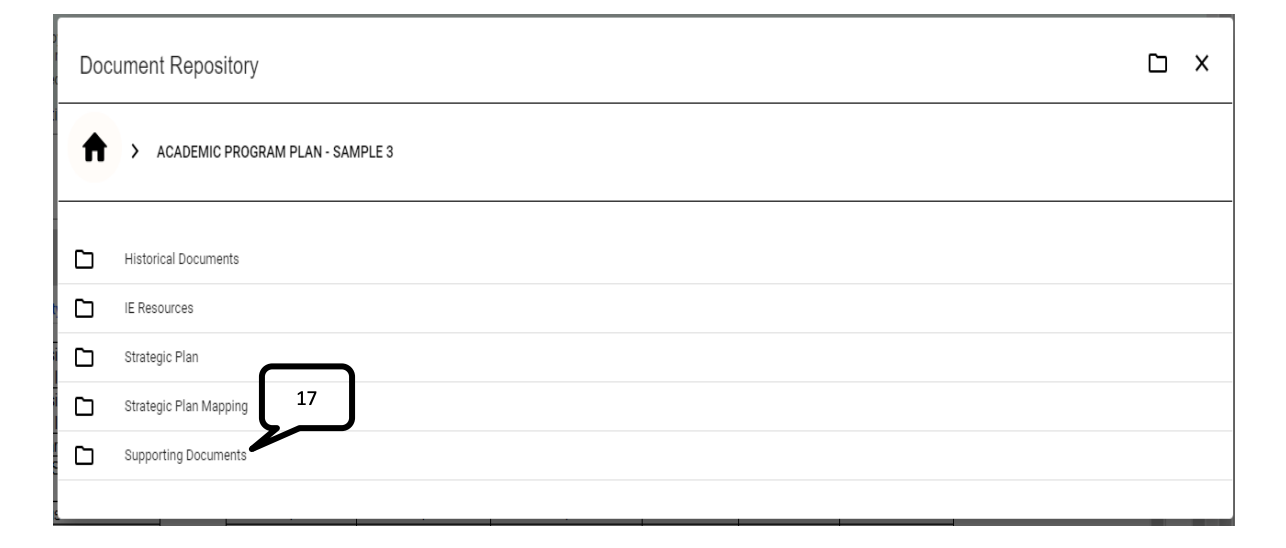
17. Click on the Supporting Documents folder.
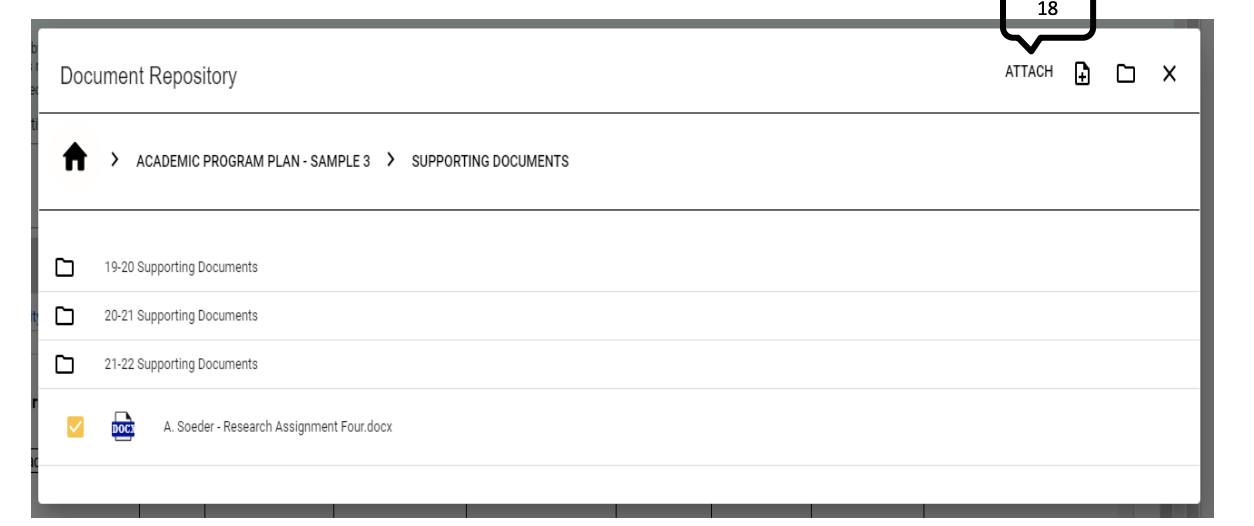
18. Select the document which needs to be attached and click on the ATTACH button.
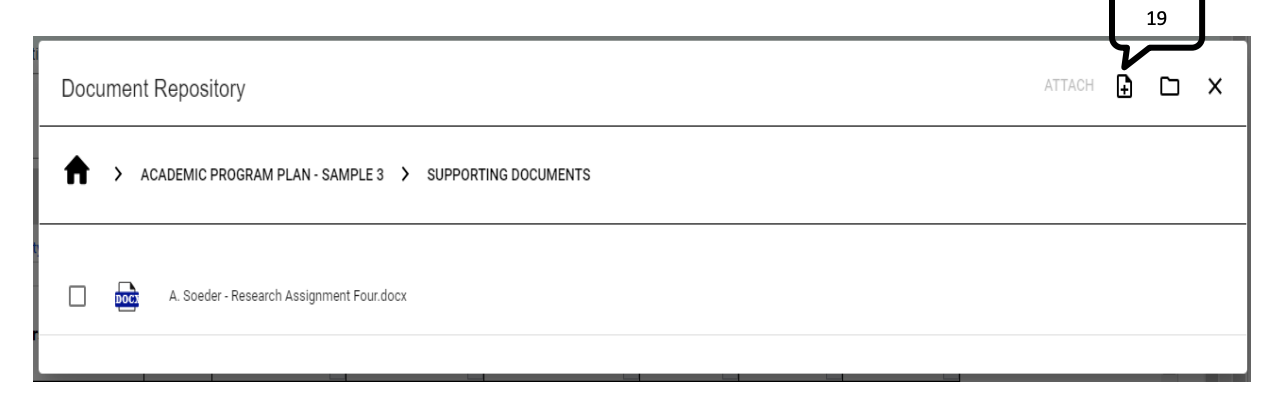
19. To add new Related Documents to support the assessment results (not currently in the Document Repository), select the Add Document button.
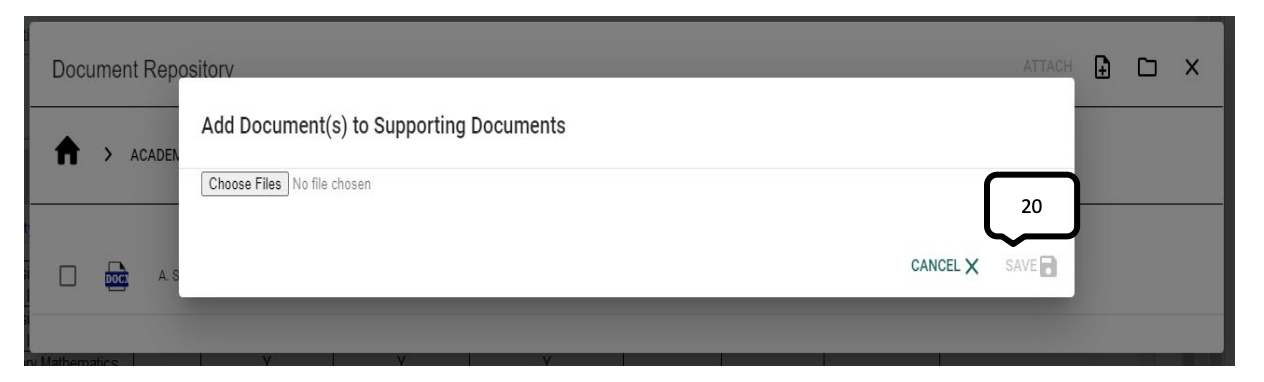
20. Select Choose Files to browse for the files saved on your computer and select Open. Click Save icon.
21. After the documents have been saved, return to Step 15 to add to Results.
22. Once all applicable files have been related and all other fields are updated, click on Save located on top right corner, then click on Close.
Adding or Updating Student Learning Outcome (SLO)/ Goal and Assessment Method
23. Using the Main (hamburger) menu to the left of the search bar, navigate to the Plan and Results tab.
There are three (3)scenarios that may occur at this point:
- New SLOs/Goals or Assessment Methods are being added and will be assessed for the upcoming cycle(s)
- See steps 24, 26
- No changes are made to the Assessment Plan SLOs/Goals except to update the planned assessment cycle (if the SLO/Goal will continue to be assessed for the next cycle)
- See step 24.d
- Existing assessment plan SLOs/Goals and/or assessment methods need to be edited or have been changed in some way
- See steps 25, 27
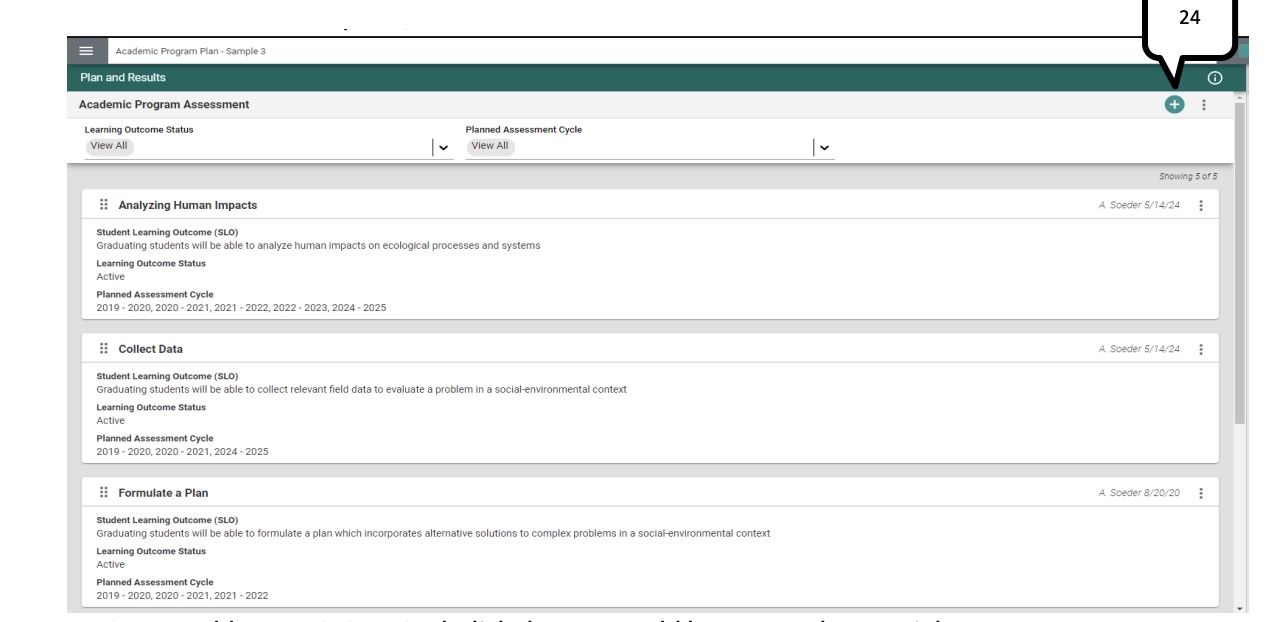
24. To add a new SLO or Goal, click the green add button on the top right corner.
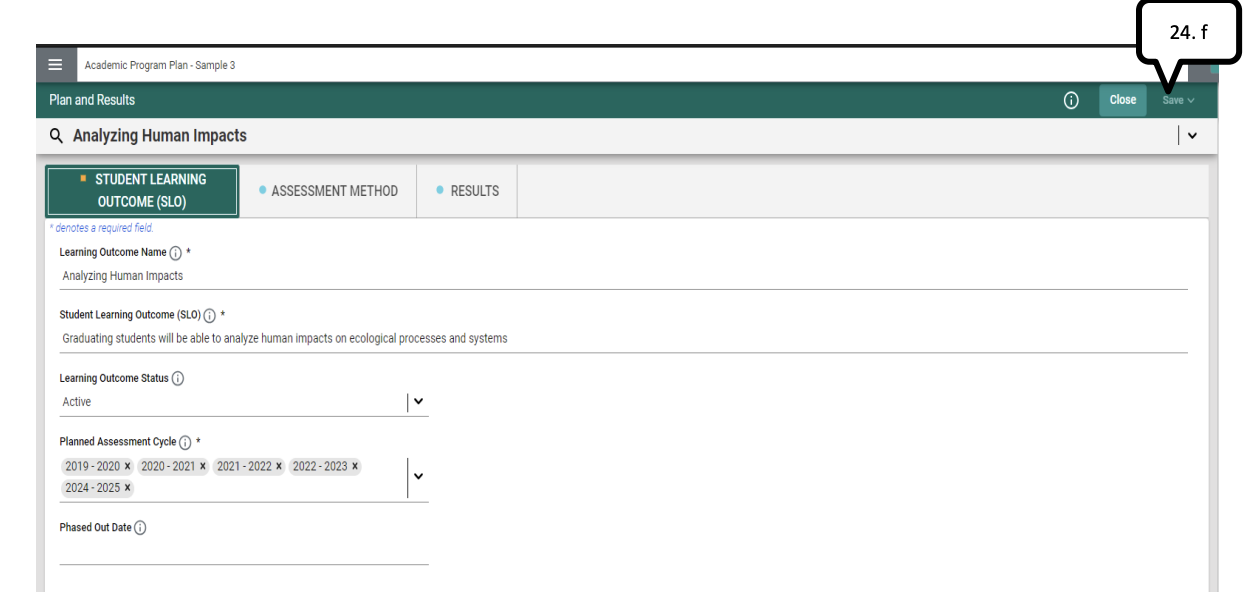
- a. Add the Learning Outcome or Goal Name. This will be a shorter reference name that will be displayed in the Summary Table on the home page. This name should succinctly summarize the key theme of the SLO or Goal. It is recommended that numbers not be used to name the SLO or Goal.
- b. Add the Student Learning Outcome (SLO) or Goal Statement. This will be the complete phrase or statement of the learning outcome or goal. Keep in mind that an SLO is defined as what students are able to demonstrate in terms of knowledge, skills, and attitudes upon completion of a program while a goal is defined as an observable and measurable outcome that assesses a particular process, service, or experience.
- c. Add the SLO or Goal Status. For a new SLO or Goal, this will be Active.
- d. Input the Planned Assessment Cycle. Please include the full year (ex. 2024-2025, or 24-25). Up to three assessment cycles can be included here at a time.
- e. If needed, select the Phase Out Date. Most often, the Phase Out date will not be populated until the assessment has actually been phased out from the active assessment plan.
- f. Be sure to Save your work when you are done adding the SLO or Goal. Save option located on top right corner.
25. To edit an existing SLO/Goal, double-click on its name or click the ellipsis located on top right corner for each SLO/Goal, select Open and then select the SLO or Goal Statement card.
- a. NOTE: If an existing SLO or Goal will NO LONGER BE ASSESSED MOVING FORWARD, you should select Phased Out as the status rather than overriding the existing SLO/Goal and create a new SLO/Goal. Once changes are made to the SLO/Goal, no historical evidence is kept in Nuventive to document previous versions.
- b. If minor adjustments are being introduced, edit SLOs/Goals by clicking and editing each field.
- i. Replace the existing text in the Learning Outcomes or Goal Name box (if it is not unique to the SLO or Goal) with a shorter descriptive phrase. It is recommended to NOT use numbers (SLO 1, Goal 4, etc.) for the name.
- ii. Ensure the correct Planned Assessment Cycles are added for the SLO/Goal. Up to 3 years can be added at a time. One or more SLOs or Goals should be marked for Planned Assessment Cycle 2025-2026.
- iii. While on the Assessment Plan screen for each SLO or Goal, take the time to review and edit any of the other information on this screen. Click on the information symbol to view instructions for each field if you have questions. Be sure to select Save located in top right corner once you are done.
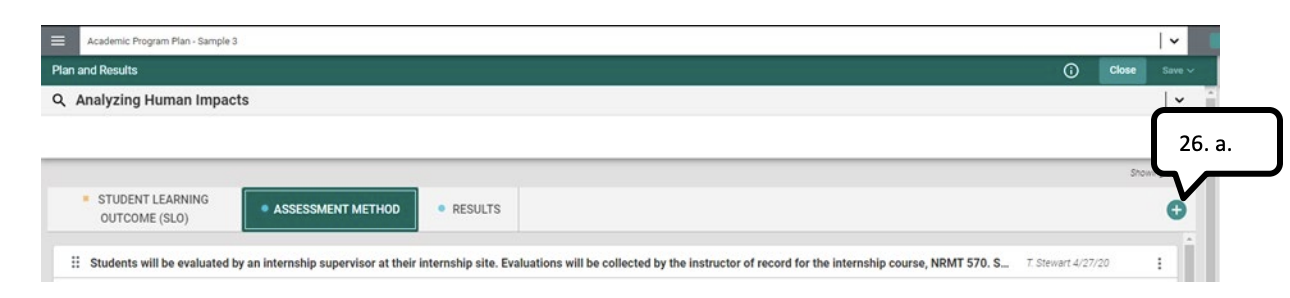
26. To add a new Assessment Method to an existing SLO/Goal or a new SLO/Goal, go to ASSESSMENT METHOD card.
- a. Click the green Addition button on the Assessment Method card.
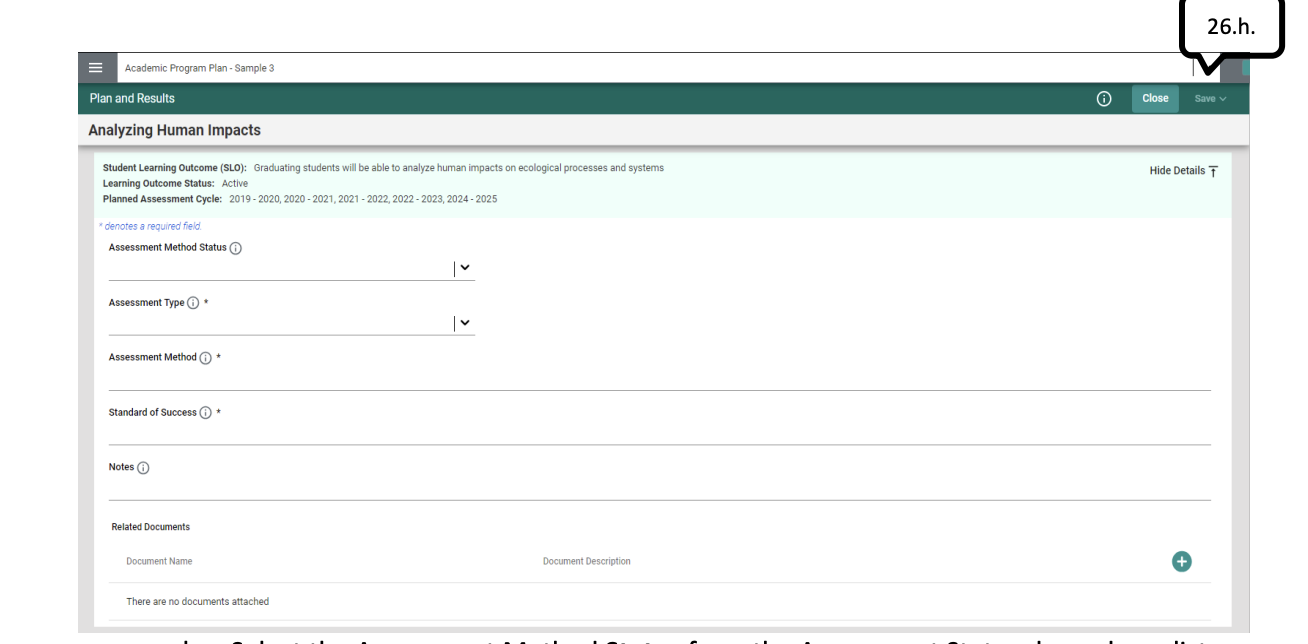
- b. Select the Assessment Method Status from the Assessment Status drop- down list.
- c. Select the Assessment Method Type from the Assessment Type drop-down list. The Assessment Method Type Definitions resource on the right hand resource viewing pane can be helpful.
- d. Add the Assessment Method. Information entered here should include what is being assessed, who administers the assessment, who is being assessed, a description of the assessment measure, when the assessment is administered, and where it is assessed (for example, physically or during a certain time cycle). Please be as detailed as possible in this section, keeping in mind that someone not familiar with the assessment could be reviewing this information during the IE Cycle. For more detailed guidance on what should be included in the Assessment Method information, refer to the Academic Program or Support Unit Rubric in the resources on the right of the screen.
- e. Add the Standard of Success. The Standard of Success should set a numerical criterion for evaluating results, align with the assessment method, and relate to the type of assessment data collected. For example, 85% of graduating students will achieve a 4 or better on the final presentation rubric.
- f. The Notes box can be used by the IE Author to add any internal notes for the author or for others related to the Assessment Method or the data collection. Use as you see fit.
- g. If there are any Related Documents to attach, follow Adding Supporting Information (Steps 14-22).
- h. Be sure to Save your work when you are done adding the Assessment Method.
**Note that at least one direct method of assessment is required for each SLO. Please avoid using student grades on graded assignments or tests. Grades often incorporate other factors (format, adherence to directions, etc.) or learning components that may not relate to performance on the SLO. Best practices for the assessment of both SLOs and Goals recommend using multiple methods or a combination of direct and indirect methods.**
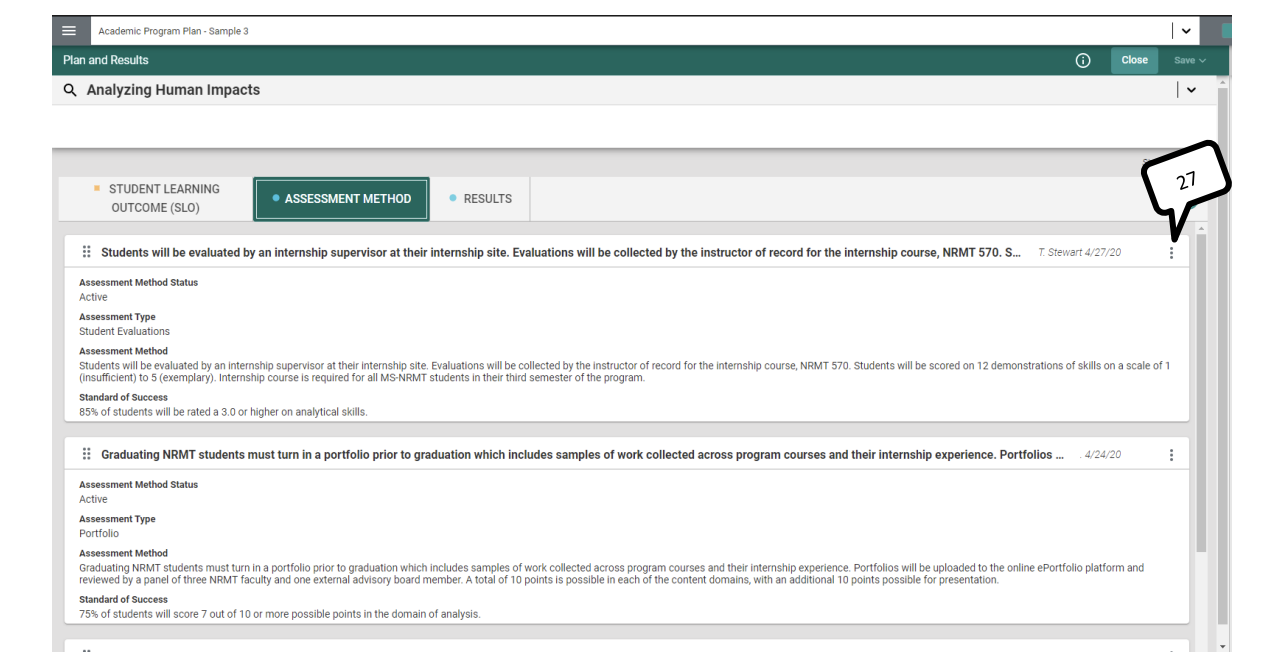
27. To edit an Assessment Method, click on the ellipsis and then select Open for each existing Assessment Method to review them and make the appropriate edits.
- a. Once changes are made to the Assessment Method, no historical evidence is kept in Nuventive to document previous versions.
- b. Use Notes to record previous information (Type, details of Assessment Method, Standard of Success, etc.).
- c. Be sure to Save.
Mapping
28. Once all Results have been added, they will need to be mapped to the university Marketable Skills or the College/Division level Map. Within the Main Menu, navigate to Mapping.
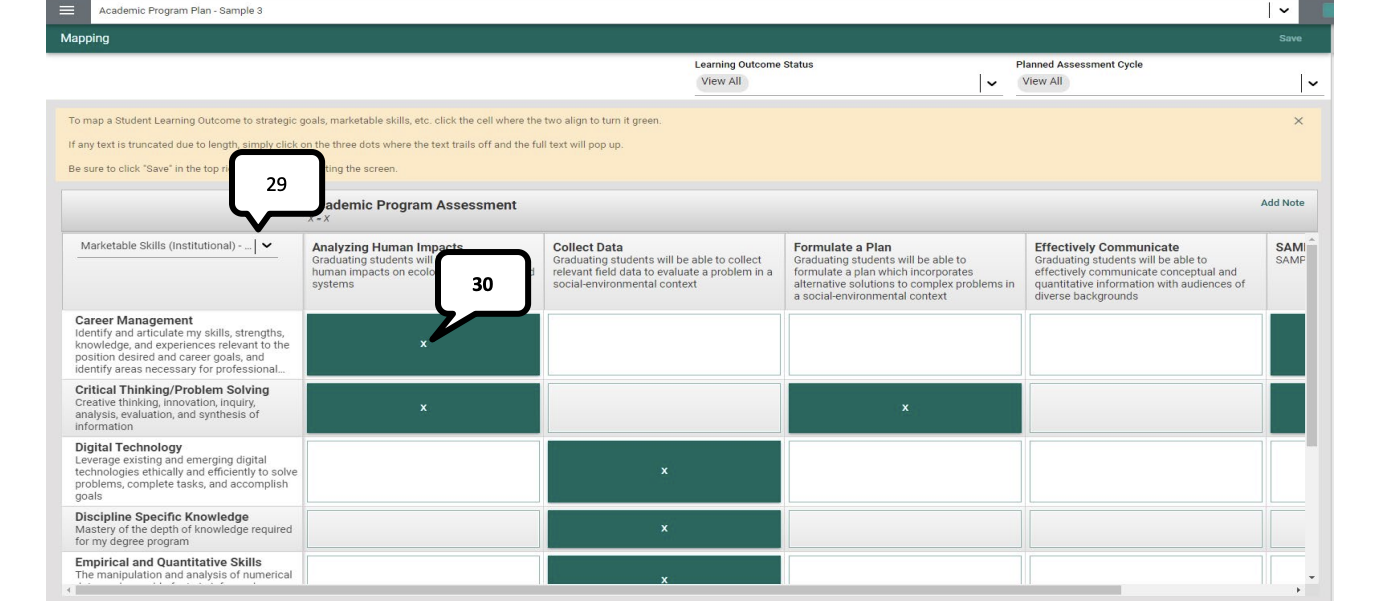
29. Select the Mapping option from the drop down menu.
30. To map an SLO or Goal, click in the intersection of the SLO or Goal and the Marketable Skill or College/Division Goals. A green box with a cross mark appears to indicate mapping.
- a. To unselect a cross mark or unmap an intersection, click on the green box with the cross mark and it will disappear.
31. Click Save located on top right corner.
32. To navigate to another Map, select the Mapping dropdown list.
Reviewing Feedback on The Assessment Report
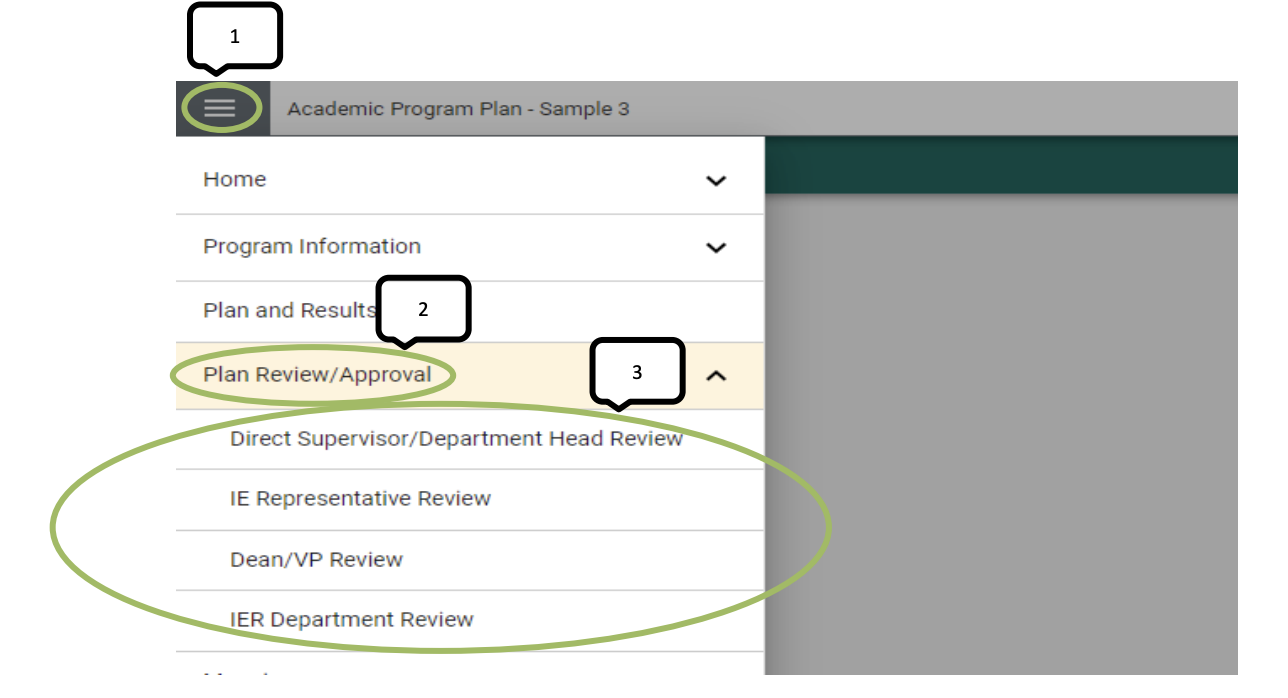
1. To review feedback completed by any of review parties, start by opening the Main Menu for your program or unit.
2. Select the Plan Review/Approval menu option.
3. From the drop-down menu options, click on the reviewer level whose feedback needs to be reviewed.

4. Click on the vertical ellipsis on the right side of the screen.
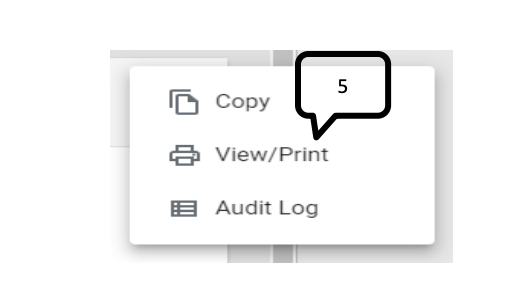
5. To access the Review/Approval form in Nuventive (also to print or download as a PDF), click on View/Print.